All Things Being Eco - Bulk Pine Resin ( Food Safe )
All Things Being Eco
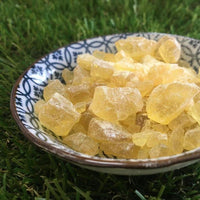
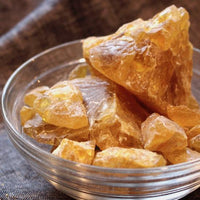
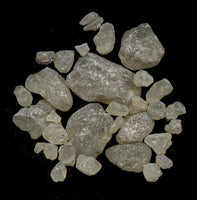
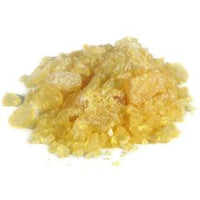
Food safe pine resin. We offer the choice to purchase as little or as much as you like. It is sold in 10g increments. If you are wanting a pound for example, you'd select 45 units of 10g (450g). If you want 100g you'd select 10 units. Nice and easy. Brazilian sourced pine, processed in Canada.
Pine resin is the harvested tree sap of a pine tree. Pine trees belong to the Pinus genus and the pinaceae family and are abundant throughout the world, including North and South America, Asia, Africa and Europe. These pieces are designed to be used to making your own beeswax wraps to ensure that it remains sticky and supple. Food Grade. We have taken the time to crush all the large chunks of resin to make it easier to melt in with your bees wax when making reusable food wraps (see recipe below, from facedownwaste.com)
Ingredients for beeswax wraps with pine resin
Here’s what approximately to use to infuse two - 25cm square cloth (and it may do one more) – bit of an inexact science though!
- 40g beeswax
- 40g pine resin
- 10g jojoba oil
This mixture is essentially a pine salve, which is a traditional antibacterial ointment (and survivalist favourite), so use any leftover on your hands and elbows.
How to make beeswax wraps with pine resin
Set up your fabric: Place your washed and dried fabric onto a baking sheet covered with a piece of compostable parchment paper (I have If You Care). You can reuse the sheet each time. I don’t bother with the parchment for wax only wraps, but pine rosin is very sticky. Preheat your oven on medium low – around 150 Celsius.
Melt the mixture using a double boiler: A double boiler is simply a metal or glass bowl placed on top of a pot of hot water. The metal bowl is an old one I reserve for this purpose. I use this method to avoid ruining my cooking pots and to have greater control over the heat of the ingredients.
Combine the beeswax, pine resin and jojoba in a double boiler on the stovetop to melt, then stir to combine (proportions are noted below in the ingredients section). It could take a little time depending on how large your chunks of wax and resin are. If your resin is a fine powder, avoid inhaling the small particles.
Infuse the fabric: Drip or paint the mixture onto the fabric*, then place in the oven for a few minutes on low heat. I’ve experimented with dipping the cloth directly into the bowl, but the coating was too heavy, and I ended up having to redistribute the wax mixture to additional pieces of fabric to soak up the excess. Some people prefer to place the fabric between two sheets of parchment and used a hot iron to melt.
If my fabric is larger than your baking sheet, I just fold it over on itself. The mixture will permeate and distribute through the fabric when heated in the oven.
A reader tip is to use the double boiler method, then pour into moulds and let set. When cooled, these harden and can be grated like beeswax blocks. Very handy to have on hand for re-waxing and a good idea for any excess mixture you’ve prepared.
Tips for choosing the right fabric
- 100% cotton fabric, preferably organic. Lightweight and tightly woven, no stretch. A blended fabric *might* work, but watch out for heating up polyester or acrylics, since these are made of plastic fibres, and I doubt the fumes would be good for you.
- Patterned or darker coloured fabrics help disguise any marks left by food drips and drops. Whatever you do, don’t go with white!
- Beeswax usually has a yellowish cast – this will colour your fabric, so choose one that won’t clash.
Care and use of your beeswax wraps
- They’re not designed to be used with hot or very drippy foods.
- The warmth of your hand on the wraps is what allows them to shape around things. It’s easiest when they’re at room temperature.
- Wash with warm soapy water, not hot.
- Don’t wrap raw meat.
- Please don’t toss the cloth when the wax wears off in six months to a year. Creased and otherwise worn looking cloths can be re-waxed at home, and reuse is the whole point, isn’t it?
** Important tip - after breaking down the pine resin for the store into smaller, more meltable pieces, I was faced with clean up. My cutting board, measuring cup and hands were quite sticky from the resin, so that's when I realized that you should designate an old bowl, pan and mixing utensils that you will use for this purpose only. After using a scrub on my hands, they were still a bit sticky, so I rubbed olive oil all over my hands and then washed them again and, VOILA!! all the stickiness was gone
*** 2nd important tip - I've made 4 wraps and discovered that less is actually better, so when you brush on your melted beeswax/pine resin/jojoba oil, brush sparingly because as you bake it in the oven, the mixture will spread as it cooks. My first wrap, I brushed both sides - BIG MISTAKE - way too sticky. Second wrap I only brushed one side but was quite liberal with the mixture - still too sticky. Third wrap I brushed on the mixture sparingly and the results were much better. Just remember if your wrap is too sticky it will leave a tacky residue on the bowls you cover and that's not fun to try to scrub off (although a bit of olive oil will remove that tackiness from the bowl).


